
How do you use chocolate molds
2025-04-24

How Do You Use Chocolate Molds: A Step-by-Step Guide
Chocolate molds are magical tools that transform ordinary melted chocolate into beautifully shaped treats, perfect for any occasion from parties to personal indulgence. Whether you’re a beginner or a seasoned baker looking to up your chocolate game, mastering the art of using chocolate molds can elevate your confectionery creations. Here’s a detailed guide on how to use them effectively.

1. Gather Your Materials
Before you start, make sure you have everything you need. You’ll need high-quality chocolate (either bars or chocolate chips, preferably couverture chocolate for the best results), your chosen chocolate molds (they come in a wide variety of shapes, from simple geometric forms to intricate designs like animals, flowers, or holiday-themed shapes), a microwave-safe bowl or a double boiler for melting the chocolate, a spatula for stirring, and optionally, some parchment paper or a baking sheet to place the filled molds on.
2. Prepare the Molds
First, clean the chocolate molds thoroughly with warm, soapy water and dry them completely. Any moisture left in the molds can cause the chocolate to seize or develop white streaks, known as “bloom.” If your molds are made of silicone, they’re usually non-stick, but for plastic or metal molds, you might want to lightly coat them with a food-grade release agent or cocoa butter to ensure easy demolding. Place the clean and prepared molds on a flat, stable surface, like a baking sheet lined with parchment paper. This makes it easier to move the filled molds around without spilling.

3. Melt the Chocolate
There are two common methods for melting chocolate: using a microwave or a double boiler.
-
Microwave Method: Break the chocolate into small, even pieces and place them in a microwave-safe bowl. Heat the chocolate in short intervals, usually 30 seconds at a time, stirring well after each interval. This prevents overheating, which can cause the chocolate to burn. Repeat this process until the chocolate is almost completely melted, then stir it until the remaining pieces melt from the residual heat.
-
Double Boiler Method: Fill the bottom pot of a double boiler with a few inches of water and bring it to a simmer. Place the chocolate in the top pot, making sure it doesn’t touch the water. Stir the chocolate constantly as it melts, ensuring an even temperature throughout. Once the chocolate is melted and smooth, remove it from the heat.
4. Temper the Chocolate (Optional but Recommended)
Tempering chocolate is a crucial step if you want a glossy finish, a crisp snap, and a longer shelf life. It involves carefully heating and cooling the chocolate to specific temperatures to stabilize the cocoa butter crystals. There are several methods to temper chocolate, but a simple one for home use is the “seeded method.” After melting the chocolate, let it cool to around 82°F - 84°F (28°C - 29°C). Then, add some chopped, tempered chocolate (about 1/4 of the total amount of melted chocolate) and stir until it’s fully melted and the temperature rises to around 88°F - 90°F (31°C - 32°C). This process might seem a bit tricky at first, but it makes a huge difference in the final quality of your chocolate creations.

5. Fill the Molds
Using a spoon or a piping bag, carefully pour or pipe the melted chocolate into the molds. Fill each cavity to the top, making sure there are no air bubbles trapped inside. You can gently tap the filled molds on the counter a few times to release any air bubbles and help the chocolate settle evenly. If there’s excess chocolate overflowing from the molds, use a spatula to scrape it off along the top edge, creating a smooth, flat surface.
6. Let the Chocolate Set
Place the filled molds in a cool, dry place away from direct sunlight and heat. If you’re in a hurry, you can put them in the refrigerator, but be aware that rapid cooling can sometimes cause the chocolate to bloom. For the best results, let the chocolate set at room temperature for about 1 - 2 hours, or until it’s completely firm. If you refrigerate the molds, let the chocolate sit in the fridge for about 15 - 20 minutes, then remove them and let them come to room temperature before 脱模 (demolding).
7. Demold the Chocolate
Once the chocolate is fully set, it’s time to release your beautiful creations from the molds. For silicone molds, gently flex the mold to loosen the chocolate, then carefully peel it away from the chocolate. For plastic or metal molds, turn the mold upside down over a clean surface and give it a gentle tap. The chocolate should pop out easily. If it doesn’t, you can try briefly warming the bottom of the mold with a hair dryer on a low setting to help release the chocolate.

Tips and Tricks
-
Experiment with adding flavors or colors to your melted chocolate. You can mix in a few drops of food - grade flavor extracts like vanilla, mint, or orange, or use cocoa butter - based food coloring to create vibrant, colorful chocolates.
-
For multi - colored chocolates, you can fill different parts of the mold with melted chocolate of various colors. Let one color set partially before adding the next to prevent them from mixing together.
-
Clean the molds immediately after use to prevent the chocolate from hardening and making them difficult to clean.
Using chocolate molds is a fun and rewarding activity that allows you to get creative with your chocolate treats. With these steps and tips in mind, you’ll be on your way to creating professional - looking, delicious chocolates in no time!
Do you put chocolate molds in the fridge or freezer
Are wooden spoons better than silicone
Related Article

When your baby starts to switch to solid food, choosing the right feeding tools is an important part of keeping meal times safe, healthy and stress-free. Among all the essential items for baby feeding, silicone baby bowls have quickly become the favorite of modern parents around the world.But why is it so important to choose the right silicone baby bowl? So how should parents screen?Let's get started.
Why choosing the right silicone baby bowl is so important

Choosing the right cup for your baby is frustrating for many new parents. From safety to durability to ease of cleaning, every detail is related to the product your baby uses every day. In recent years, silicone baby cups have become increasingly popular among parents around the world. But are they really better than traditional glasses? How do you choose the right one for your child?This guide will tell you everything you need to know.
How to Choose a Suitable Silicone Cup for Your Baby
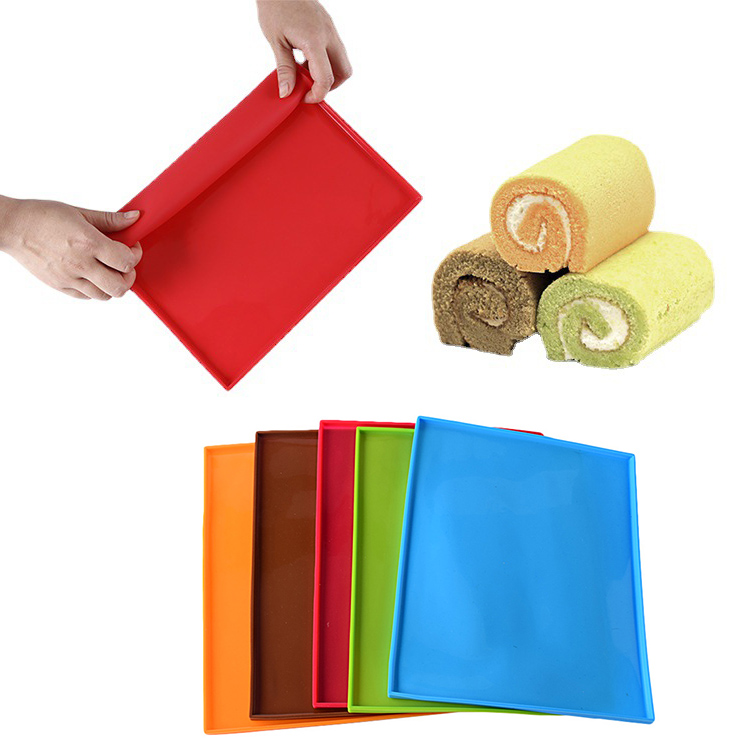
If you enjoy baking at home, you know how convenient a good silicone baking mat can be. From cookies to roasted vegetables to dough kneading, it offers a reusable, eco-friendly alternative to parchment paper.
A common question many bakers ask is: Can silicone baking mats go in the dishwasher?
The answer is yes—but there are a few things you should know to keep your mat clean, safe, and long-lasting. Let’s take a look.
A common question many bakers ask is: Can silicone baking mats go in the dishwasher?
The answer is yes—but there are a few things you should know to keep your mat clean, safe, and long-lasting. Let’s take a look.
can silicone baking mats go in the dishwasher

If you love cooking, you probably appreciate the comfort and convenience that silicone utensils bring to your kitchen. From flexible spatulas to heat-resistant spoons, they make stirring, flipping, and mixing much easier. But when it’s time to clean up, one question often comes up: Are silicone utensils dishwasher safe?
The short answer — yes! But let’s take a closer look at why silicone utensils are not only safe for dishwashers but also one of the smartest choices for a modern kitchen.
The short answer — yes! But let’s take a closer look at why silicone utensils are not only safe for dishwashers but also one of the smartest choices for a modern kitchen.
are silicone utensils dishwasher safe
SEND MESSAGE