
How to freeze dry candy
2025-05-15
How to Freeze Dry Candy: A Step-by-Step Guide
If you’re a candy lover looking to explore new textures and extend the shelf life of your favorite treats, freeze-drying candy is a fascinating process worth trying. Freeze-drying removes the moisture from candy, transforming it into a crunchy, lightweight, and intensely flavored delight. In this blog post, we'll walk you through the step-by-step process of how to freeze dry candy, allowing you to enjoy your sweet indulgences in a whole new way.

Gather Your Equipment and Ingredients
Before you start the freeze-drying process, make sure you have all the necessary equipment and ingredients on hand. Here’s what you’ll need:
-
Freeze Dryer: This is the key piece of equipment for the process. You can choose a commercial-grade freeze dryer for larger batches or a smaller, home-use model if you're just starting out and planning to make smaller quantities.
-
Candy: Select your favorite candies. Popular choices include gummy bears, fruit chews, marshmallows, and hard candies. Just make sure the candies are free from any added fillings that might not freeze dry well, like creamy centers.
-
Freezer-Safe Containers or Trays: You’ll need these to hold the candy during the pre-freezing stage.
-
Gloves: Wear gloves when handling the candies to avoid adding moisture from your hands.
Pre-Freeze the Candy
The first step in freeze-drying candy is to pre-freeze it. Place the candies in the freezer-safe containers or trays, making sure they are spread out evenly and not touching each other. This allows for better freezing and even moisture removal during the freeze-drying process. Put the containers or trays in the freezer and let the candies freeze solid. This usually takes a few hours, but it can vary depending on the type and size of the candy. For larger candies or thicker gummies, it might take up to 8 - 12 hours.

Set Up the Freeze Dryer
Once the candies are completely frozen, it’s time to set up your freeze dryer. Follow the manufacturer’s instructions for your specific model. Generally, this involves ensuring the chamber is clean and dry, setting the appropriate temperature and vacuum settings, and making sure the condenser is functioning properly. Some freeze dryers allow you to program the cycle time and temperature, which is crucial for a successful freeze-drying process.
Load the Frozen Candy into the Freeze Dryer
Carefully transfer the frozen candies from the freezer containers or trays into the freeze dryer chamber. Try to arrange them in a single layer for optimal results. Close the chamber door tightly to create a sealed environment. The freeze dryer will then start the process of reducing the pressure inside the chamber while keeping it at a low temperature. This causes the ice in the frozen candies to sublimate, turning directly from a solid to a gas, bypassing the liquid phase.
Monitor the Freeze-Drying Process
The duration of the freeze-drying process can vary depending on the type of candy and the settings of your freeze dryer. Typically, it can take anywhere from 12 to 48 hours. It’s important to monitor the process periodically. Some freeze dryers have indicators that show the progress of the cycle, such as changes in pressure or temperature. You can also visually check the candies. As the moisture is removed, they will start to look slightly shriveled and lose their glossy appearance.
Check for Completion
To determine if the freeze-drying process is complete, you can perform a simple test. Take out a piece of candy and let it sit at room temperature for a few minutes. If it feels completely dry, hard, and brittle, with no signs of stickiness or moisture, then it’s ready. If the candy still feels soft or sticky in any areas, put it back in the freeze dryer for a few more hours.
Store the Freeze-Dried Candy
Once the candy is fully freeze-dried, transfer it to airtight containers or resealable bags. Store the containers in a cool, dry place away from direct sunlight. Freeze-dried candy can last for several months to a year when stored properly, making it a convenient treat to have on hand.

Freeze-drying candy is not only a fun DIY project but also a great way to experiment with different flavors and textures. Whether you want to create unique gifts or simply enjoy your favorite candies in a new form, following these steps will help you achieve delicious, crunchy freeze-dried treats. So, gather your supplies, pick your candies, and start freeze-drying today!
How to make cupcakes
How to make chocolate in molds
Related Article

When your baby starts to switch to solid food, choosing the right feeding tools is an important part of keeping meal times safe, healthy and stress-free. Among all the essential items for baby feeding, silicone baby bowls have quickly become the favorite of modern parents around the world.But why is it so important to choose the right silicone baby bowl? So how should parents screen?Let's get started.
Why choosing the right silicone baby bowl is so important

Choosing the right cup for your baby is frustrating for many new parents. From safety to durability to ease of cleaning, every detail is related to the product your baby uses every day. In recent years, silicone baby cups have become increasingly popular among parents around the world. But are they really better than traditional glasses? How do you choose the right one for your child?This guide will tell you everything you need to know.
How to Choose a Suitable Silicone Cup for Your Baby
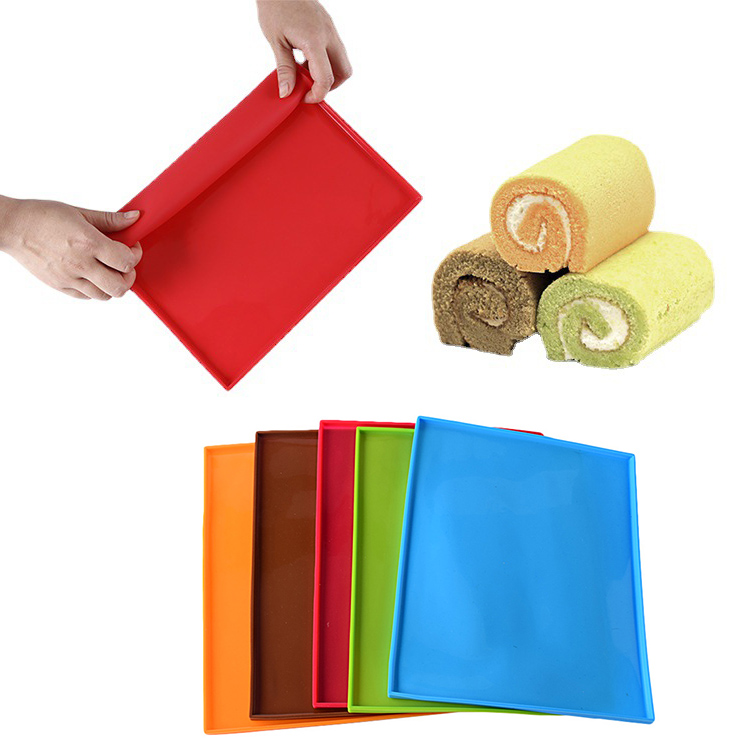
If you enjoy baking at home, you know how convenient a good silicone baking mat can be. From cookies to roasted vegetables to dough kneading, it offers a reusable, eco-friendly alternative to parchment paper.
A common question many bakers ask is: Can silicone baking mats go in the dishwasher?
The answer is yes—but there are a few things you should know to keep your mat clean, safe, and long-lasting. Let’s take a look.
A common question many bakers ask is: Can silicone baking mats go in the dishwasher?
The answer is yes—but there are a few things you should know to keep your mat clean, safe, and long-lasting. Let’s take a look.
can silicone baking mats go in the dishwasher

If you love cooking, you probably appreciate the comfort and convenience that silicone utensils bring to your kitchen. From flexible spatulas to heat-resistant spoons, they make stirring, flipping, and mixing much easier. But when it’s time to clean up, one question often comes up: Are silicone utensils dishwasher safe?
The short answer — yes! But let’s take a closer look at why silicone utensils are not only safe for dishwashers but also one of the smartest choices for a modern kitchen.
The short answer — yes! But let’s take a closer look at why silicone utensils are not only safe for dishwashers but also one of the smartest choices for a modern kitchen.
are silicone utensils dishwasher safe
SEND MESSAGE