
How to get chocolate out of silicone molds without breaking
2025-04-24
How to Get Chocolate Out of Silicone Molds Without Breaking
Creating beautiful, perfectly shaped chocolates is a delightful process, but the final step—removing them from silicone molds without breaking—can be a bit tricky. Fear not! With the right techniques and a little patience, you can easily release your chocolate masterpieces intact. Here’s a step-by-step guide to help you achieve flawless results every time.

1. Wait for the Right Time
The first and most crucial step is to ensure your chocolate has fully set. Chocolate needs time to harden and reach the right consistency. Leave the filled silicone molds in a cool, dry place away from direct sunlight or heat sources. Depending on the temperature and the type of chocolate you used, this usually takes 1 - 2 hours. You can gently tap the mold to check if the chocolate has solidified; if there’s no movement or wobbling, it’s ready to be removed. Avoid rushing this step, as attempting to remove the chocolate too soon will likely result in it breaking or deforming.
2. Prepare Your Workspace
Before you start, clear a clean, flat surface to work on. A stable surface will give you better control when removing the chocolates. You can also place a soft cloth or a non-slip mat underneath the mold to prevent it from sliding around while you’re working. This added stability helps you apply gentle pressure without accidentally knocking the mold.
3. Loosen the Edges
Gently run your finger around the edges of each chocolate cavity in the silicone mold. This simple action helps break the seal between the chocolate and the mold, making it easier to release. Be very careful not to dig your fingernail into the chocolate, as this can cause cracks or damage. If you prefer, you can also use a small, flexible spatula to gently pry the edges away from the mold.

4. Invert the Mold
Once the edges are loosened, carefully turn the mold upside down over your prepared surface. Hold the mold firmly by the edges and give it a gentle shake or tap. The flexibility of the silicone mold should allow the chocolates to release easily under the force of gravity. If a chocolate doesn’t come out right away, don’t force it. Instead, try bending the mold slightly to create a bit more space and encourage the chocolate to drop out. Start by gently flexing one corner of the mold and gradually work your way around.
5. Troubleshooting
If you encounter stubborn chocolates that still won’t budge, there are a few additional tricks you can try. One option is to briefly place the bottom of the mold in warm water (not hot, as excessive heat can melt the chocolate). The heat will slightly soften the chocolate, making it easier to release. Another approach is to put the mold in the refrigerator for a few minutes. The sudden temperature change can cause the chocolate to contract slightly, separating it from the mold.
6. Storage
Once you’ve successfully removed all the chocolates, store them in an airtight container in a cool place. Avoid stacking the chocolates directly on top of each other, as this can cause them to stick together or break. You can place a layer of parchment paper between each layer of chocolates to keep them separated and protected.

By following these steps, you’ll be able to effortlessly remove your chocolates from silicone molds without any breakage. With practice, you’ll become a pro at creating and releasing beautiful, professional-looking chocolates every time. Happy chocolate making!
What is a silicone baking mat used for
Do you put chocolate molds in the fridge or freezer
Related Article

When your baby starts to switch to solid food, choosing the right feeding tools is an important part of keeping meal times safe, healthy and stress-free. Among all the essential items for baby feeding, silicone baby bowls have quickly become the favorite of modern parents around the world.But why is it so important to choose the right silicone baby bowl? So how should parents screen?Let's get started.
Why choosing the right silicone baby bowl is so important

Choosing the right cup for your baby is frustrating for many new parents. From safety to durability to ease of cleaning, every detail is related to the product your baby uses every day. In recent years, silicone baby cups have become increasingly popular among parents around the world. But are they really better than traditional glasses? How do you choose the right one for your child?This guide will tell you everything you need to know.
How to Choose a Suitable Silicone Cup for Your Baby
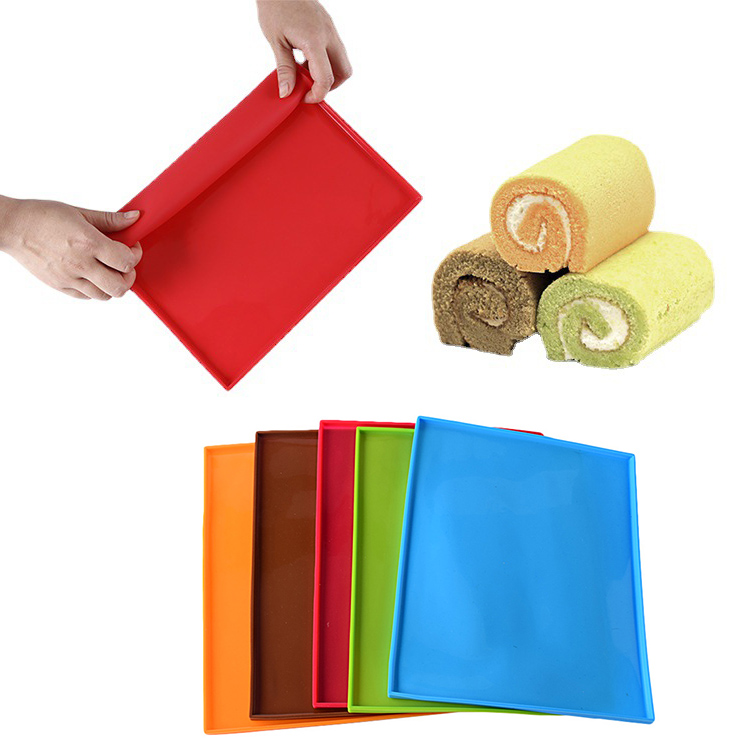
If you enjoy baking at home, you know how convenient a good silicone baking mat can be. From cookies to roasted vegetables to dough kneading, it offers a reusable, eco-friendly alternative to parchment paper.
A common question many bakers ask is: Can silicone baking mats go in the dishwasher?
The answer is yes—but there are a few things you should know to keep your mat clean, safe, and long-lasting. Let’s take a look.
A common question many bakers ask is: Can silicone baking mats go in the dishwasher?
The answer is yes—but there are a few things you should know to keep your mat clean, safe, and long-lasting. Let’s take a look.
can silicone baking mats go in the dishwasher

If you love cooking, you probably appreciate the comfort and convenience that silicone utensils bring to your kitchen. From flexible spatulas to heat-resistant spoons, they make stirring, flipping, and mixing much easier. But when it’s time to clean up, one question often comes up: Are silicone utensils dishwasher safe?
The short answer — yes! But let’s take a closer look at why silicone utensils are not only safe for dishwashers but also one of the smartest choices for a modern kitchen.
The short answer — yes! But let’s take a closer look at why silicone utensils are not only safe for dishwashers but also one of the smartest choices for a modern kitchen.
are silicone utensils dishwasher safe
SEND MESSAGE