
How to make cupcakes from scratch
2025-05-16
How to Make Cupcakes from Scratch: A Step-by-Step Guide
There’s something incredibly satisfying about baking cupcakes from scratch. Not only do you get to control the quality of ingredients, but the process itself is therapeutic, and the end result—a batch of fluffy, homemade treats—is simply irresistible. In this blog post, I’ll walk you through a foolproof recipe and guide you through each step to create perfect cupcakes every time.

Ingredients You’ll Need
Before you start, gather these basic ingredients:
-
1 1/2 cups all-purpose flour
-
1 teaspoon baking powder
-
1/2 teaspoon baking soda
-
1/4 teaspoon salt
-
1/2 cup unsalted butter, softened
-
1 cup granulated sugar
-
2 large eggs
-
1 teaspoon vanilla extract
-
1/2 cup milk

Step 1: Preheat the Oven and Prepare the Cupcake Pan
Preheat your oven to 350°F (175°C). Line a 12-cup muffin tin with paper liners. This simple step ensures easy removal of the cupcakes and adds a decorative touch.
Step 2: Mix the Dry Ingredients
In a medium bowl, whisk together the flour, baking powder, baking soda, and salt. Whisking helps to aerate the dry ingredients and ensures an even distribution of leavening agents. Set this bowl aside for now.
Step 3: Cream the Butter and Sugar
In a large bowl, use an electric mixer on medium speed to cream the softened butter and granulated sugar together until light and fluffy. This process usually takes about 3 - 5 minutes. The mixture should be pale in color and have an almost whipped texture. Creaming the butter and sugar properly incorporates air into the batter, which contributes to the cupcakes’ light and airy texture.
Step 4: Add the Eggs and Vanilla
Add the eggs one at a time, beating well after each addition. Make sure each egg is fully incorporated before adding the next. Then, stir in the vanilla extract. The eggs act as binders and add moisture to the cupcakes, while the vanilla enhances the overall flavor.
Step 5: Combine the Dry and Wet Ingredients
Gradually add the dry ingredient mixture to the wet ingredients, alternating with the milk. Begin and end with the dry ingredients. Mix until just combined, being careful not to overmix. Overmixing can develop too much gluten in the flour, resulting in tough cupcakes. The batter should be smooth and pourable.
Step 6: Fill the Cupcake Liners
Use a cookie scoop or a tablespoon to fill each paper liner about two-thirds full. This allows enough room for the cupcakes to rise without overflowing. Smooth the tops of the batter gently with the back of the spoon.
Step 7: Bake the Cupcakes
Place the muffin tin in the preheated oven and bake for 18 - 22 minutes, or until a toothpick inserted into the center of a cupcake comes out clean. Baking times may vary depending on your oven, so start checking for doneness at 18 minutes. Once baked, remove the tin from the oven and let the cupcakes cool in the tin for 5 minutes. Then, transfer them to a wire rack to cool completely.
Step 8: Frost and Decorate (Optional but Recommended!)
Once the cupcakes are completely cooled, it’s time to get creative with frosting and decorations. You can make a simple buttercream frosting by combining 1/2 cup unsalted butter, 2 cups powdered sugar, 1 - 2 tablespoons milk, and 1 teaspoon vanilla extract. Whip the ingredients together until smooth and creamy. Pipe or spread the frosting onto the cupcakes, and add sprinkles, edible flowers, or other decorations to make them as beautiful as they are delicious.

Tips for Success
-
Make sure all your ingredients are at room temperature. This helps them blend together more easily and results in a smoother batter.
-
Don’t open the oven door too often while the cupcakes are baking. This can cause the temperature to drop and lead to uneven baking or sunken cupcakes.
-
If you want to experiment with flavors, you can add a teaspoon of cocoa powder for chocolate cupcakes, or a tablespoon of lemon zest for a citrusy twist.
Making cupcakes from scratch may seem daunting at first, but with this simple recipe and step-by-step guide, you’ll be a cupcake pro in no time. So, roll up your sleeves, preheat that oven, and get ready to enjoy the sweet rewards of your baking efforts!
How to make muffins
How long to bake mini cupcakes
Related Article

When your baby starts to switch to solid food, choosing the right feeding tools is an important part of keeping meal times safe, healthy and stress-free. Among all the essential items for baby feeding, silicone baby bowls have quickly become the favorite of modern parents around the world.But why is it so important to choose the right silicone baby bowl? So how should parents screen?Let's get started.
Why choosing the right silicone baby bowl is so important

Choosing the right cup for your baby is frustrating for many new parents. From safety to durability to ease of cleaning, every detail is related to the product your baby uses every day. In recent years, silicone baby cups have become increasingly popular among parents around the world. But are they really better than traditional glasses? How do you choose the right one for your child?This guide will tell you everything you need to know.
How to Choose a Suitable Silicone Cup for Your Baby
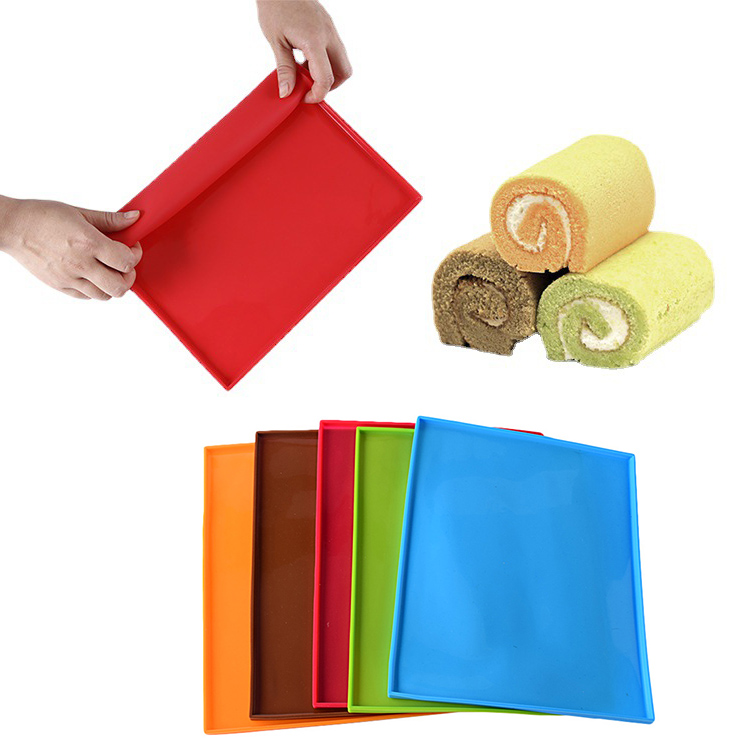
If you enjoy baking at home, you know how convenient a good silicone baking mat can be. From cookies to roasted vegetables to dough kneading, it offers a reusable, eco-friendly alternative to parchment paper.
A common question many bakers ask is: Can silicone baking mats go in the dishwasher?
The answer is yes—but there are a few things you should know to keep your mat clean, safe, and long-lasting. Let’s take a look.
A common question many bakers ask is: Can silicone baking mats go in the dishwasher?
The answer is yes—but there are a few things you should know to keep your mat clean, safe, and long-lasting. Let’s take a look.
can silicone baking mats go in the dishwasher

If you love cooking, you probably appreciate the comfort and convenience that silicone utensils bring to your kitchen. From flexible spatulas to heat-resistant spoons, they make stirring, flipping, and mixing much easier. But when it’s time to clean up, one question often comes up: Are silicone utensils dishwasher safe?
The short answer — yes! But let’s take a closer look at why silicone utensils are not only safe for dishwashers but also one of the smartest choices for a modern kitchen.
The short answer — yes! But let’s take a closer look at why silicone utensils are not only safe for dishwashers but also one of the smartest choices for a modern kitchen.
are silicone utensils dishwasher safe
SEND MESSAGE