
how to make molded chocolate
2025-07-11
How to Make Molded Chocolate
There's something magical about biting into a perfectly shaped chocolate—smooth, shiny, and tailored to your favorite design. Making molded chocolate at home isn't just for professionals; with the right tools, anyone can create stunning treats. As a manufacturer of silicone chocolate molds, we're sharing our step-by-step guide to crafting flawless molded chocolate, plus why our silicone molds make the process easier (and more fun!) than you'd think.

What You'll Need
Before diving in, gather these essentials:
-
High-quality chocolate (dark, milk, or white—avoid candy melts for a rich, smooth finish)
-
A silicone chocolate mold (our designs are ideal here—more on that later!)
-
A double boiler or microwave-safe bowl
-
A spatula or spoon
-
A pastry bag or ziplock bag (for filling intricate molds)
-
A clean, dry workspace

Step 1: Prep Your Mold
The key to clean, easy-to-release chocolate is a properly prepared mold. Wash your silicone mold with warm, soapy water and dry it completely—even a tiny drop of water can cause chocolate to seize or lose its shine. Our silicone molds have a non-stick surface, so no need for oil or spray—just ensure it’s dry and free of dust.
Step 2: Melt the Chocolate
Melting chocolate correctly is crucial. Here’s how:
-
Double boiler method: Fill a pot with 1–2 inches of water and bring to a simmer. Place a heatproof bowl on top (ensure it doesn’t touch the water). Break chocolate into small pieces and add to the bowl, stirring gently until smooth.
-
Microwave method: Chop chocolate into small pieces and place in a microwave-safe bowl. Heat in 15–20 second bursts, stirring between each, until 75% melted. Continue stirring—residual heat will melt the rest, preventing overheating.
Pro tip: Overheated chocolate becomes grainy. Keep an eye on it, and stop heating as soon as most pieces are melted.
Step 3: Temper the Chocolate (Optional but Recommended)
Tempering ensures chocolate sets with a glossy finish and a satisfying snap. For beginners, skip this if you’re short on time, but know that tempered chocolate releases from molds more cleanly. Here’s a simple way:
-
Once melted, add a handful of chopped, unmelted chocolate to the bowl. Stir until fully melted and the mixture reaches 88–90°F (31–32°C) for dark chocolate, or 86–88°F (30–31°C) for milk/white.
Step 4: Fill the Mold
Pour or pipe melted chocolate into the mold, filling each cavity to the top. Use a spatula to scrape off excess chocolate, ensuring a flat, even surface. Tap the mold gently on the counter 2–3 times—this releases air bubbles that can ruin the finish. Our silicone molds are flexible, making tapping easy without worrying about damage.
Step 5: Set the Chocolate
Place the mold in the refrigerator for 15–20 minutes (or at room temperature for 1–2 hours) until completely firm. Avoid the freezer, as sudden temperature changes can cause condensation.
Step 6: Unmold and Enjoy
Here’s where silicone shines: gently flex the mold’s sides to loosen the chocolate, then push up from the bottom of each cavity. The chocolate should pop out cleanly, retaining every detail of the mold’s design. If any pieces stick (rare with our molds!), pop the mold back in the fridge for 5 more minutes—chocolate shrinks slightly as it cools, making release easier.

Why Our Silicone Chocolate Molds Stand Out
-
Intricate Details, Easy Release: Our molds are precision-crafted to capture even tiny designs (think lace patterns, mini shapes, or 3D figures). The flexible silicone ensures every detail comes out sharp, without breaking delicate edges.
-
Food-Grade Safety: Made from 100% food-grade silicone, our molds are BPA-free, heat-resistant (up to 446°F/230°C), and safe for use in the oven, microwave, or freezer—perfect for experimenting with chocolate, candy, or even frozen yogurt bites.
-
Durable and Reusable: Unlike plastic molds that crack or warp, our silicone molds are built to last. They’re dishwasher-safe (top rack) for easy cleanup, so you can use them again and again.
-
Versatile Shapes: From classic hearts and stars to playful animals or seasonal designs, our molds cater to every occasion—birthdays, holidays, or just a Tuesday treat.

Final Tips for Success
-
Use high-quality chocolate with at least 30% cocoa butter—this ensures smooth melting and clean release.
-
Work in a cool room (below 75°F/24°C) to prevent chocolate from melting prematurely.
-
For layered or colored chocolates, let each layer set completely before adding the next—our molds’ flat surface makes this easy.
Making molded chocolate at home is a delightful, rewarding project, and the right mold makes all the difference. Our silicone molds combine precision, durability, and ease of use, turning even beginner bakers into chocolate artisans. So grab a mold, melt some chocolate, and let your creativity shine—your sweet tooth will thank you.
how many calories in 2 boiled eggs
when do kids stop playing with toys
Related Article

When your baby starts to switch to solid food, choosing the right feeding tools is an important part of keeping meal times safe, healthy and stress-free. Among all the essential items for baby feeding, silicone baby bowls have quickly become the favorite of modern parents around the world.But why is it so important to choose the right silicone baby bowl? So how should parents screen?Let's get started.
Why choosing the right silicone baby bowl is so important

Choosing the right cup for your baby is frustrating for many new parents. From safety to durability to ease of cleaning, every detail is related to the product your baby uses every day. In recent years, silicone baby cups have become increasingly popular among parents around the world. But are they really better than traditional glasses? How do you choose the right one for your child?This guide will tell you everything you need to know.
How to Choose a Suitable Silicone Cup for Your Baby
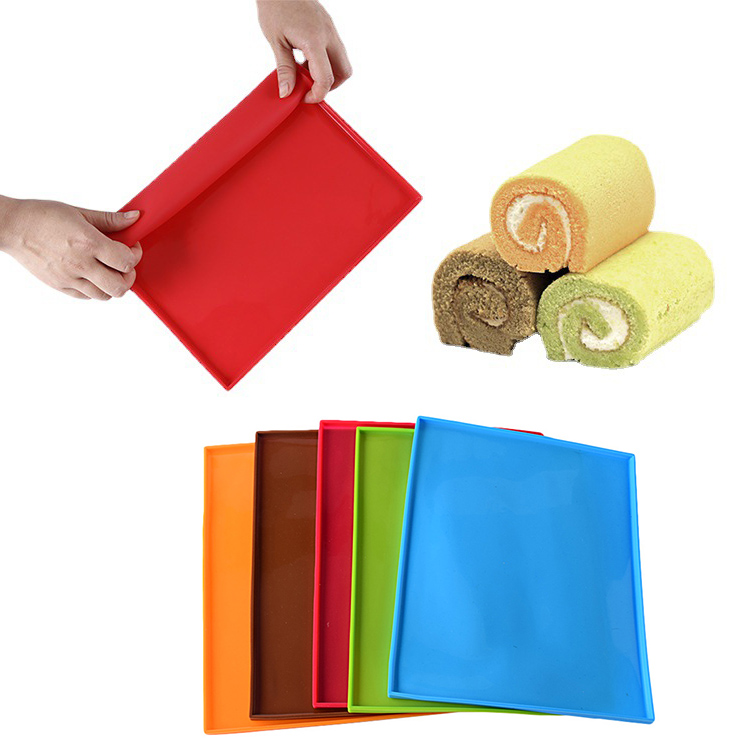
If you enjoy baking at home, you know how convenient a good silicone baking mat can be. From cookies to roasted vegetables to dough kneading, it offers a reusable, eco-friendly alternative to parchment paper.
A common question many bakers ask is: Can silicone baking mats go in the dishwasher?
The answer is yes—but there are a few things you should know to keep your mat clean, safe, and long-lasting. Let’s take a look.
A common question many bakers ask is: Can silicone baking mats go in the dishwasher?
The answer is yes—but there are a few things you should know to keep your mat clean, safe, and long-lasting. Let’s take a look.
can silicone baking mats go in the dishwasher

If you love cooking, you probably appreciate the comfort and convenience that silicone utensils bring to your kitchen. From flexible spatulas to heat-resistant spoons, they make stirring, flipping, and mixing much easier. But when it’s time to clean up, one question often comes up: Are silicone utensils dishwasher safe?
The short answer — yes! But let’s take a closer look at why silicone utensils are not only safe for dishwashers but also one of the smartest choices for a modern kitchen.
The short answer — yes! But let’s take a closer look at why silicone utensils are not only safe for dishwashers but also one of the smartest choices for a modern kitchen.
are silicone utensils dishwasher safe
SEND MESSAGE