
How to remove toothbrush holder from wall
2025-05-08
How to Remove Toothbrush Holder from Wall
Removing a toothbrush holder from the wall might seem like a straightforward task, but it requires some care to avoid damaging the wall surface. In this blog, we'll guide you through the process of removing two common types of silicone toothbrush holders - the self - adhesive backed one and the mirror - effect suction - based one.

Removing a Self - Adhesive Silicone Toothbrush Holder
Step 1: Heat the Adhesive
The first step in removing a self - adhesive toothbrush holder is to heat the adhesive. This softens the glue, making it easier to detach the holder from the wall. The most common tool for this is a hairdryer. Set the hairdryer to a medium - high heat setting and hold it about 2 - 3 inches away from the back of the toothbrush holder. Move the hairdryer in a slow, circular motion for about 1 - 2 minutes. This will warm up the adhesive and weaken its bond with the wall.
Step 2: Gently Pry the Holder
Once the adhesive is heated, take a flat - edged tool such as a plastic putty knife or a credit card. Insert the tool carefully between the toothbrush holder and the wall at one corner. Apply gentle pressure to pry the holder away from the wall. Be very careful not to use too much force, as this could scratch or damage the wall. Slowly work your way around the edges of the holder, prying it off bit by bit.
Step 3: Remove Residual Adhesive
After the toothbrush holder is removed, there will likely be some adhesive residue left on the wall. Here are several methods to get rid of it:
-
Using Rubbing Alcohol: Soak a clean cloth or cotton ball in rubbing alcohol (isopropyl alcohol with at least 70% concentration). Press the alcohol - soaked cloth onto the adhesive residue and let it sit for a few minutes. This allows the alcohol to break down the adhesive. Then, gently rub the area in a circular motion until the residue is removed.
-
Applying Vinegar: White vinegar can also be effective. Dampen a cloth with vinegar and place it on the adhesive. Let it soak for 5 - 10 minutes. Vinegar's acidic nature helps dissolve the glue. After soaking, scrub the residue with the cloth.
-
Using an Eraser: For small patches of adhesive, a regular household eraser can be used. Rub the eraser firmly over the residue. This method is more suitable for smooth wall surfaces like painted drywall.
-
Commercial Adhesive Removers: There are many commercial adhesive removers available in the market. Follow the instructions on the product label. Usually, you spray or apply the remover to the adhesive residue, let it sit for a specified time, and then wipe it off.

Removing a Mirror - Effect Silicone Toothbrush Holder
Step 1: Release the Suction
The mirror - effect silicone toothbrush holder uses suction to adhere to the wall. To remove it, start by breaking the suction seal. Look for a small tab or edge on the side of the holder. If there is a tab, gently lift it up. This will allow air to enter between the holder and the wall, breaking the suction. If there's no tab, take a thin, flat object like a sewing needle or the tip of a butter knife. Insert it carefully between the holder and the wall at one edge to create a small opening for air to get in.
Step 2: Pull the Holder Off
Once the suction is released, you can simply pull the toothbrush holder off the wall. It should come away easily. If it seems stuck, double - check that the suction has been fully broken. Do not pull too hard as this could potentially damage the holder or the wall surface if there's still some suction remaining.
Step 3: Clean the Wall Surface
After removing the holder, the wall surface may have some marks or a slightly sticky residue from the suction. Wipe the area with a clean, damp cloth. This should remove most of the marks. If there are stubborn marks, you can use a mild soap solution. Apply the soap solution to the cloth and gently scrub the area. Rinse the area with clean water and dry it thoroughly.

Tips and Precautions
-
When using heat to remove the self - adhesive holder, be cautious if the wall surface is heat - sensitive. For example, if it's a vinyl - covered wall or has a delicate paint finish, excessive heat could cause damage.
-
When using any liquid to remove adhesive residue, test it on a small, inconspicuous area of the wall first to ensure it doesn't discolor or damage the surface.
-
Always work slowly and carefully to avoid any unnecessary damage to the wall or the toothbrush holder, especially if you plan to reuse the holder.
Removing a toothbrush holder from the wall doesn't have to be a difficult task. By following these steps, you can safely and effectively remove your silicone toothbrush holder, leaving your wall in good condition.
How to stop toothbrush holder going mouldy
How to prevent mold in toothbrush holder
Related Article

When your baby starts to switch to solid food, choosing the right feeding tools is an important part of keeping meal times safe, healthy and stress-free. Among all the essential items for baby feeding, silicone baby bowls have quickly become the favorite of modern parents around the world.But why is it so important to choose the right silicone baby bowl? So how should parents screen?Let's get started.
Why choosing the right silicone baby bowl is so important

Choosing the right cup for your baby is frustrating for many new parents. From safety to durability to ease of cleaning, every detail is related to the product your baby uses every day. In recent years, silicone baby cups have become increasingly popular among parents around the world. But are they really better than traditional glasses? How do you choose the right one for your child?This guide will tell you everything you need to know.
How to Choose a Suitable Silicone Cup for Your Baby
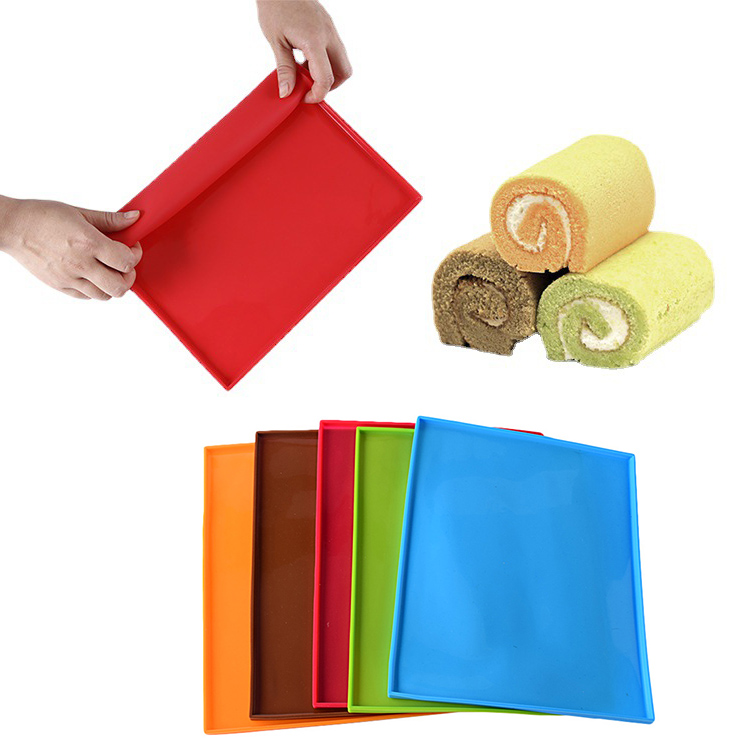
If you enjoy baking at home, you know how convenient a good silicone baking mat can be. From cookies to roasted vegetables to dough kneading, it offers a reusable, eco-friendly alternative to parchment paper.
A common question many bakers ask is: Can silicone baking mats go in the dishwasher?
The answer is yes—but there are a few things you should know to keep your mat clean, safe, and long-lasting. Let’s take a look.
A common question many bakers ask is: Can silicone baking mats go in the dishwasher?
The answer is yes—but there are a few things you should know to keep your mat clean, safe, and long-lasting. Let’s take a look.
can silicone baking mats go in the dishwasher

If you love cooking, you probably appreciate the comfort and convenience that silicone utensils bring to your kitchen. From flexible spatulas to heat-resistant spoons, they make stirring, flipping, and mixing much easier. But when it’s time to clean up, one question often comes up: Are silicone utensils dishwasher safe?
The short answer — yes! But let’s take a closer look at why silicone utensils are not only safe for dishwashers but also one of the smartest choices for a modern kitchen.
The short answer — yes! But let’s take a closer look at why silicone utensils are not only safe for dishwashers but also one of the smartest choices for a modern kitchen.
are silicone utensils dishwasher safe
SEND MESSAGE